Growing your own chili peppers at home can be an exciting and rewarding endeavor. Whether you’re a seasoned gardener or a beginner, the process can be simple and satisfying. In this article, we’ll explore the basic steps to start your chili pepper garden, the types of peppers you can grow, the care they require, and address some common questions.
Why Grow Chili Peppers?
Chili peppers add flavor, heat, and color to dishes. They’re also rich in vitamins A and C, and have health benefits like improved metabolism. Growing your own can provide you with fresh produce right at your fingertips, saving money and adding a new dimension to your cooking.
Latest Posts
- How to Use Invisible Wire for a Stunning Climbing Plant Wall
- Are Your Garden Tools Making Your Plants Sick?
- How to Style a Small Studio with Columnar Cacti
- Why Is My Zucchini Shaped Like a Lightbulb?
- How to Protect Your Fruit From Birds Without Nets
- How to Keep Squirrels Away from Your Fruit Trees
- How to Protect Your Fruit from Birds Without Nets
- Why Biochar Is a Game-Changer for Your Kitchen Garden
- Why Some Rare Cacti Bloom Only One Night a Year
- How to Grow Rare Blue Strawberries at Home
Step 1: Choose Your Pepper Variety
Before you begin planting, it’s essential to choose the right pepper variety. Here are a few popular types:
- Jalapeño: Medium heat with a rich flavor; great for salsas.
- Habanero: Very hot with a fruity flavor; excellent in hot sauces.
- Serrano: Less spicy than habaneros, often used in Mexican cuisine.
- Bell Pepper: Sweet and mild; a great starter pepper for beginners.
Consider your heat tolerance and culinary preferences when making your selection.
Step 2: Gather Your Materials
Here is a basic list of materials you’ll need:

- Seeds: Purchase high-quality seeds from a reliable source.
- Seed trays or pots: Use small containers with drainage holes.
- Potting mix: A well-draining mix is essential. You can buy pre-made potting soil or mix your own.
- Watering can or spray bottle: For gentle watering.
- Labels: To keep track of different varieties.
- Grow lights (optional): If you’re starting seeds indoors, especially in low-light conditions.
Step 3: Start Seeds Indoors
Starting seeds indoors is ideal, especially in cooler climates. Follow these steps:
- Fill your trays: Use a seed-starting mix to fill your trays or pots, leaving about 1/2 inch from the top.
- Moisten the soil: Lightly water the soil until it’s damp but not soaked.
- Plant the seeds: Plant seeds about 1/4 inch deep and cover them lightly with soil.
- Label your trays: Indicate the pepper variety and the planting date.
- Provide warmth: Chili peppers prefer warmth for germination. Keep the trays in a warm location or use a heat mat.
Step 4: Provide Light
Once seedlings emerge, they will need plenty of light. If possible, place them near a south-facing window or use grow lights for 12-16 hours a day. Make sure to rotate your plants to encourage even growth.

Step 5: Watering and Fertilizing
It’s important to maintain consistent moisture. Here’s how:
- Water: Keep the soil moist but not waterlogged. Check daily and water when the top layer feels dry.
- Fertilize: Once seedlings develop a couple of sets of true leaves, start with a diluted, balanced fertilizer every 2-4 weeks. Functioning nutrients support healthy growth.
Step 6: Transplanting
After about 6-8 weeks (when the seedlings are about 4 inches tall and have several true leaves), it’s time to transplant them outdoors.
- Choose the right spot: Look for a sunny location with well-draining soil.
- Prepare the soil: Mix in compost or other organic matter to enrich it.
- Harden off your seedlings: Gradually expose your seedlings to outdoor conditions over a week to acclimate them.
- Transplant: Dig holes in the soil large enough to accommodate the root ball. Plant each seedling, backfill with soil, and water thoroughly.
Step 7: Care and Maintenance
Once your seedlings are in the ground, they will need ongoing care:
Watering
Continue consistent watering. Peppers prefer soil that is kept evenly moist but not soggy. In hotter weather, daily watering may be necessary.

Fertilizing
As your plants grow, you might want to switch to a fertilizer higher in potassium for fruiting. A fertilizer ratio of 5-10-10 is often recommended during the fruiting stage.
Pest Control
Keep an eye out for pests like aphids and spider mites. Introduce beneficial insects or use insecticidal soap or neem oil to manage infestations.
Pruning
Pruning may help promote air circulation and focus energy on producing fruits. Pinch off the first few flowers to encourage larger fruit later.
Supporting Your Plants
As your pepper plants grow taller, some varieties may need support. Use stakes or cages to help stabilize them.
Step 8: Harvesting
Chili peppers can be harvested at various stages, depending on the type and your preference:
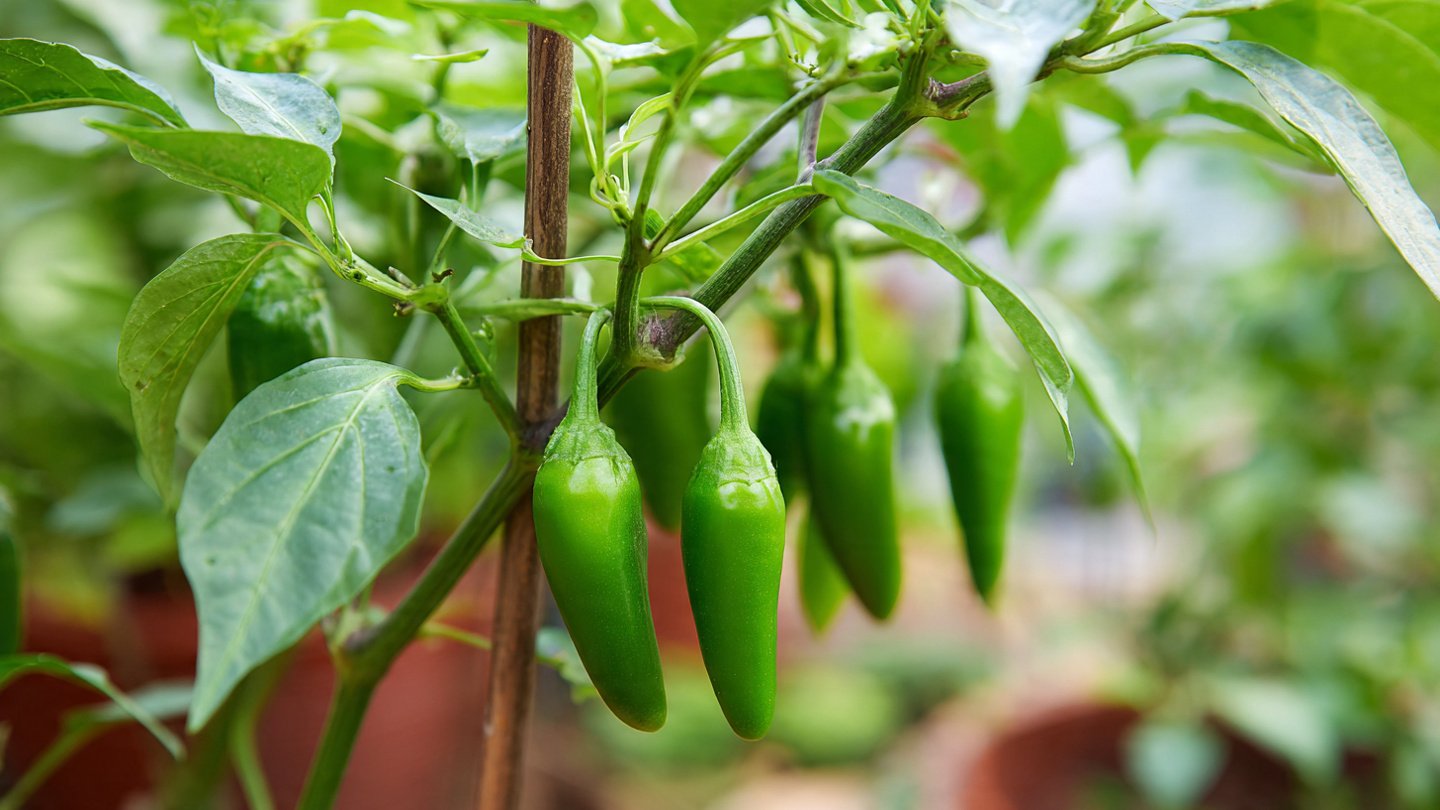
- For mild peppers: Harvest when they are green.
- For maximal heat: Wait until the peppers change color (often red).

Use scissors to cut the fruit from the plant, leaving a small part of the stem attached.
Conclusion
Growing your own chili peppers is not only straightforward but also immensely satisfying. With the right preparation and care, you can enjoy a bountiful harvest of fresh, flavorful peppers.
FAQs
1. How long does it take for chili peppers to grow?
Chili peppers generally take around 70 to 100 days from seed to harvest, depending on the variety.
2. Can I grow chili peppers indoors?
Yes! Chili peppers can be grown indoors as long as they receive enough light (12-16 hours daily) and are kept in a warm, humid environment.
3. Do chili peppers need a lot of sunlight?
Yes, chili peppers thrive in full sun, meaning they need at least 6-8 hours of direct sunlight per day.
4. What’s the best way to store fresh chili peppers?
Fresh chili peppers can be stored in the refrigerator for about a week. For long-term storage, consider drying or freezing them.
5. Are chili peppers perennials or annuals?

In most climates, chili peppers are grown as annuals, but they can be perennial in warmer climates or if grown indoors.
6. What temperature is best for growing chili peppers?
Chili peppers thrive in temperatures between 70°F to 90°F (21°C to 32°C) during the day.
7. How can I tell if my peppers are ripe?
Peppers are ripe when they reach their full size and color. Always check the variety-specific characteristics, as some are meant to be harvested when green, while others are best when fully red.
8. Can I save seeds from my chili peppers?
Yes, you can save seeds from ripe peppers for future planting. Remember to dry the seeds completely before storing them in a cool, dry place.
9. What should I do if my chili plants are wilting?
Wilting could be a sign of overwatering, underwatering, or pest issues. Check the soil moisture and inspect for signs of pests or diseases.
By following these simple steps, you’ll be well on your way to growing your own chili peppers at home. Enjoy the process, experiment with flavors, and reap the rewards of your hard work! Happy gardening!