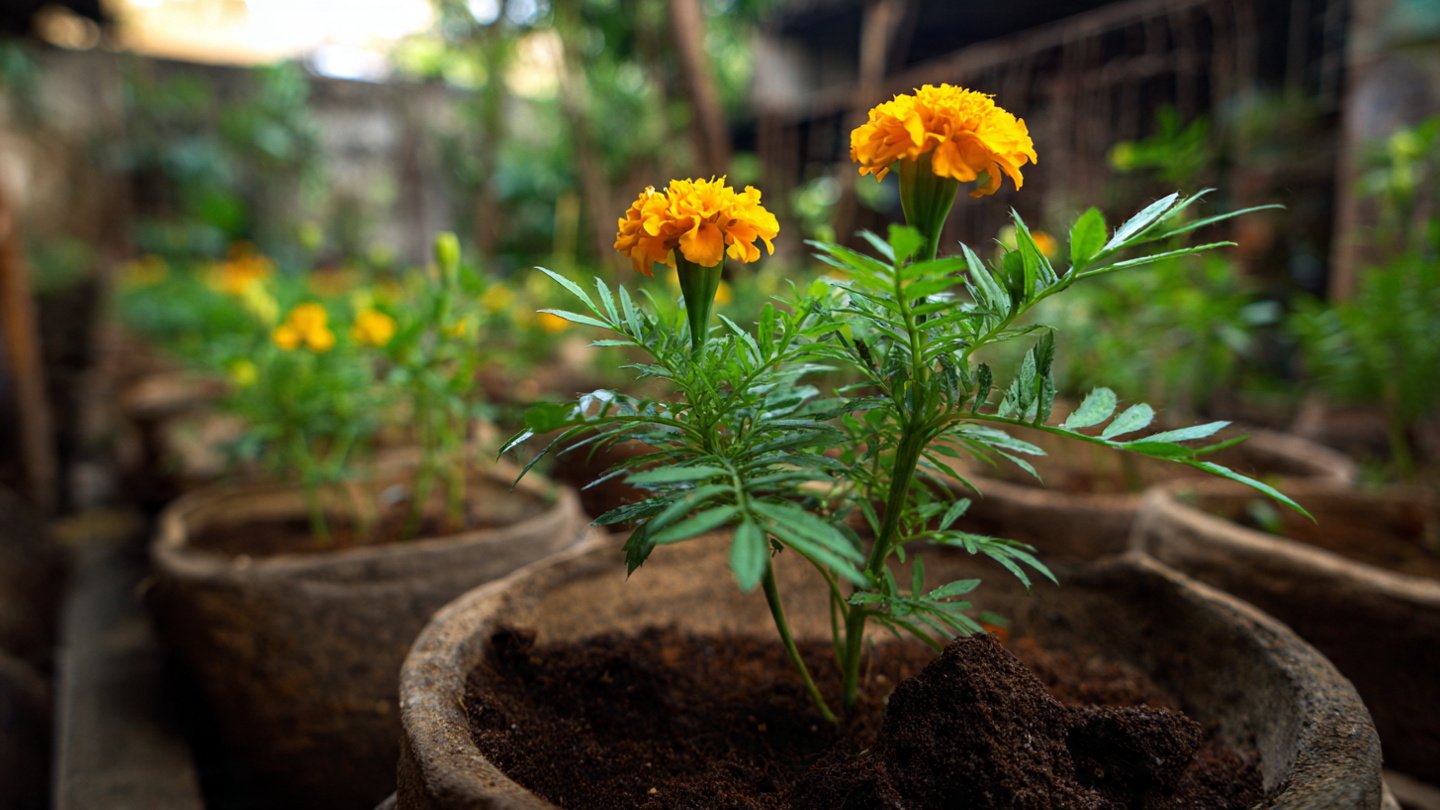
Marigolds are among the most beloved flowers in gardens worldwide, prized for their vibrant colors, easy care, and ability to attract beneficial insects. Propagating marigolds at home is a rewarding experience that enriches your garden and provides a hands-on project for beginners. This article will guide you through the simple steps to successfully propagate marigold plants, from seed selection to nurturing your new plants, along with a helpful FAQ section.
Understanding Marigold Plants
Types of Marigolds
Latest Posts
- How to Use Invisible Wire for a Stunning Climbing Plant Wall
- Are Your Garden Tools Making Your Plants Sick?
- How to Style a Small Studio with Columnar Cacti
- Why Is My Zucchini Shaped Like a Lightbulb?
- How to Protect Your Fruit From Birds Without Nets
- How to Keep Squirrels Away from Your Fruit Trees
- How to Protect Your Fruit from Birds Without Nets
- Why Biochar Is a Game-Changer for Your Kitchen Garden
- Why Some Rare Cacti Bloom Only One Night a Year
- How to Grow Rare Blue Strawberries at Home
Before diving into propagation methods, it’s essential to understand the different types of marigolds. The most popular varieties include:
- African Marigolds (Tagetes erecta): Known for their large, bright blooms and tall stature.
- French Marigolds (Tagetes patula): Smaller and bushier, available in multiple colors.
- Signet Marigolds (Tagetes tenuifolia): Characterized by their small flowers and edible foliage, commonly used in cooking.
Why Propagate Marigolds?
Marigolds are not only beautiful, but they also play a crucial role in pest control in gardens. Their strong scent can repel harmful insects, and they attract pollinators, making them an excellent companion plant. Propagating marigolds helps you save money, cultivate plants that are suited to your local environment, and share this delightful flower with friends and family.
Step-by-Step Guide to Propagating Marigold Plants
Step 1: Gather Materials

To propagate marigolds, you’ll need:
- Seeds: Opt for high-quality seeds from a reputable source.
- Containers: Seed trays or small pots with drainage holes.
- Growing Medium: A mix of potting soil and vermiculite or peat moss for good drainage.
- Watering Can or Spray Bottle: For gentle watering.
- Plastic Wrap or a Clear Lid: To cover your containers initially to maintain humidity.
- Labels: To mark different varieties if you are planting more than one type.
Step 2: Seed Selection
Choose the type of marigold you want to grow. If you’re unsure, French and African marigolds are good starting points for beginners. Purchase seeds from a local nursery, garden center, or reputable online source.
Step 3: Prepare Your Containers
Fill your containers with the growing medium, leaving about half an inch from the top. Lightly compact the soil but avoid making it too dense, as marigold seeds need some aeration for sprouting.
- Moisten the Soil: Use a spray bottle to lightly moisten the soil. It should be damp but not soggy.

Step 4: Sowing the Seeds
- Planting Depth: Marigold seeds should be planted about 1/4 to 1/2 inch deep.
- Spacing: Space the seeds a few inches apart. For smaller containers, you can plant multiple seeds but ensure they have enough space to grow.
- Covering Seeds: Gently cover the seeds with the soil, tapping down lightly to ensure good seed-to-soil contact.
Step 5: Create a Humid Environment
Cover the containers with plastic wrap or a clear lid to create a greenhouse effect. This will help retain moisture and warmth, both essential for seed germination.
Step 6: Provide Proper Conditions
Place the containers in a warm, bright spot but avoid direct sunlight until seedlings emerge. Ideal temperatures for germination range from 70 to 75°F (21 to 24°C).
- Watering: Check regularly to ensure the soil remains moist. Use a spray bottle to avoid disturbing the seeds.
- Light: Once seeds germinate, usually within 7 to 14 days, remove the cover and move them to a brighter location where they can receive indirect sunlight.
Step 7: Thinning Seedlings

Once your seedlings have grown to about 2 inches tall and have a pair of true leaves, it’s time to thin them out. Remove the weaker seedlings by cutting them at the soil level with scissors to avoid disturbing the roots of the remaining plants.
Step 8: Transplanting Marigolds
After about 4 to 6 weeks, your marigold seedlings should be ready for transplantation when they have developed a strong root system and several sets of true leaves.
-
Hardening Off: Gradually acclimate your seedlings to outdoor conditions by placing them outside for a few hours a day, increasing the time over a week or so.
-
Choosing a Location: Select a sunny spot in your garden or use larger pots if you’re gardening in containers.
-
Transplanting: Dig a hole slightly larger than the root ball of the seedling. Place the seedling in the hole, fill it with soil, and gently pack it down.
Step 9: Care and Maintenance
Once transplanted, your marigolds will thrive with proper care:
- Watering: Keep the soil consistently moist, especially during dry spells.
- Fertilization: Use a balanced fertilizer every 4 to 6 weeks during the growing season.
- Pest Control: Monitor for pests such as aphids and spider mites. Use insecticidal soap if necessary.

Step 10: Enjoy Your Blooms
With proper care, your marigold plants will flourish and produce an abundance of vibrant flowers. Whether you use them for landscaping, in flower arrangements, or simply to brighten up your space, the rewards of your propagation efforts will surely bring joy.
Frequently Asked Questions (FAQs)
1. When is the best time to propagate marigold seeds?
The best time to start marigold seeds indoors is 6-8 weeks before the last expected frost. For outdoor planting, wait until after the last frost has passed and the soil has warmed.
2. Do marigold plants need full sun?
Yes, marigolds thrive in full sun and require at least 6 hours of sunlight each day to grow healthy and bloom abundantly.
3. Can I propagate marigolds from cuttings?
Marigolds are primarily propagated from seeds rather than cuttings because they are not a woody plant. While you may try cuttings, they are less likely to root successfully.

4. How often should I water my marigolds?
Water your marigolds when the top inch of soil feels dry. Be careful not to overwater, as marigolds do not tolerate soggy conditions.
5. Are marigolds annual or perennial?
Most marigold varieties are annual, meaning they complete their life cycle within a single growing season. However, some varieties may behave as perennials in warm climates.
6. How do I save marigold seeds for next season?
Allow some flower heads to mature and dry on the plant. Once dried, collect the seeds, store them in a cool, dry place, and label for the next planting season.
7. Do marigolds require special soil?
Marigolds prefer well-draining soil that is rich in organic matter. A basic potting mix should work well for growing from seeds.
Conclusion
Propagating marigolds at home can be a rewarding and fulfilling endeavor. With their stunning colors and pest-repelling properties, marigolds make a wonderful addition to any garden. By following these simple steps, even beginners can successfully grow marigolds from seeds and enjoy their beauty throughout the blooming season. Happy gardening!