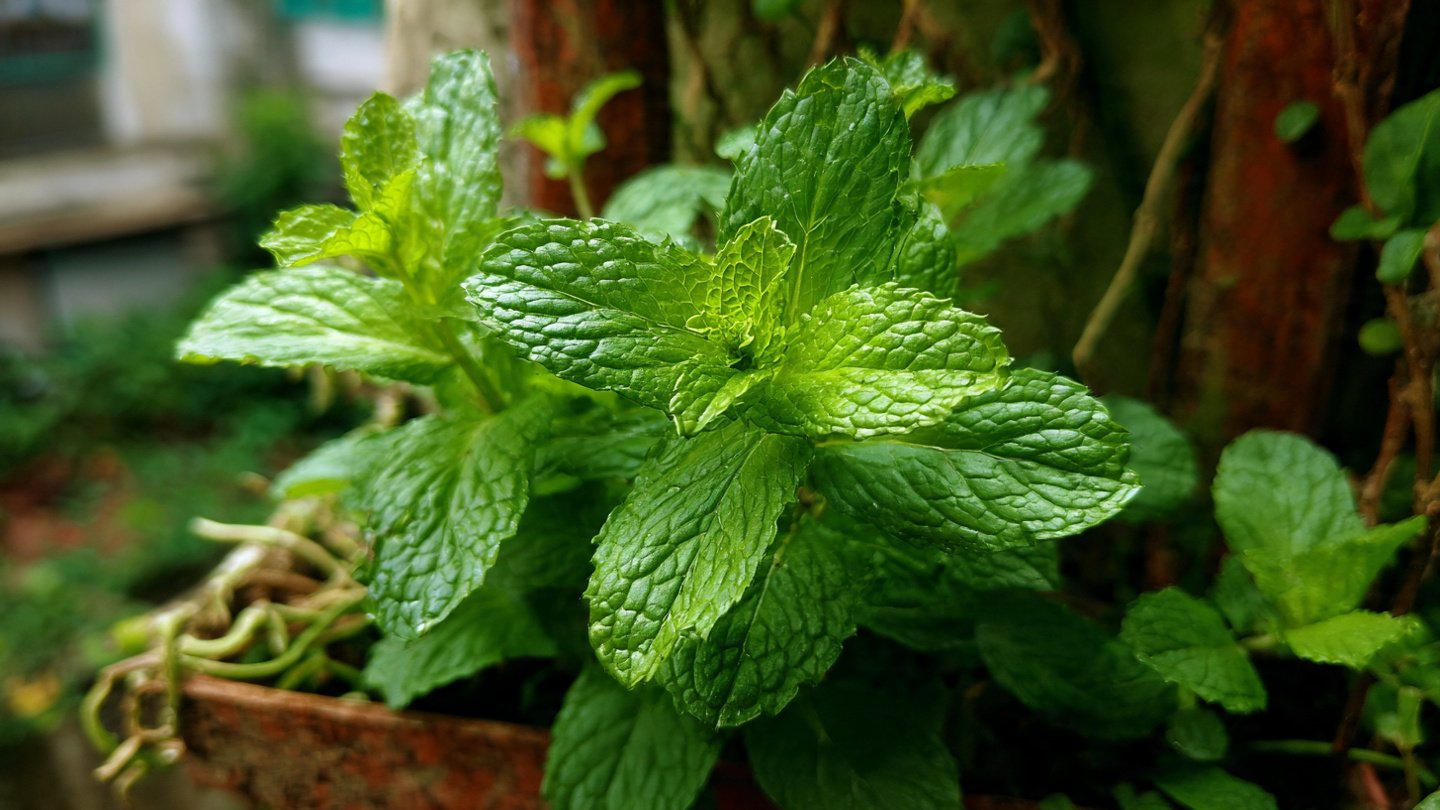
Mint is one of the most versatile herbs in cooking and gardening. Its refreshing flavor enhances everything from salads and drinks to desserts and savory dishes. Growing your own mint can be incredibly rewarding, and it’s surprisingly easy! One of the simplest ways to propagate mint is through stem cuttings. In this article, we’ll explore how to grow fresh mint from cuttings, the best practices, and answers to some frequently asked questions.
Why Grow Mint?
Mint (Mentha) is a perennial herb known for its invigorating scent and flavor. Here are a few reasons to consider growing mint:
Latest Posts
- How to Use Invisible Wire for a Stunning Climbing Plant Wall
- Are Your Garden Tools Making Your Plants Sick?
- How to Style a Small Studio with Columnar Cacti
- Why Is My Zucchini Shaped Like a Lightbulb?
- How to Protect Your Fruit From Birds Without Nets
- How to Keep Squirrels Away from Your Fruit Trees
- How to Protect Your Fruit from Birds Without Nets
- Why Biochar Is a Game-Changer for Your Kitchen Garden
- Why Some Rare Cacti Bloom Only One Night a Year
- How to Grow Rare Blue Strawberries at Home
-
Culinary Versatility: Mint can be used in a variety of dishes, from herbal teas to savory sauces, giving your meals a burst of freshness.
-
Easy to Grow: Mint is robust and can thrive in various environmental conditions, making it an ideal choice even for beginner gardeners.
-
Health Benefits: Mint is rich in antioxidants and has various health benefits, including aiding digestion and reducing nausea.
-
Attracts Pollinators: Growing mint in your garden helps attract bees and other beneficial insects, contributing to a healthy ecosystem.
-
Fragrant Foliage: The fragrant leaves of mint make it a delightful addition to any garden or indoor plant collection.
Propagating Mint from Stem Cuttings
Step 1: Choose the Right Varieties

Before you start propagating, it’s essential to select the right variety of mint. Some popular varieties include:
-
Peppermint (Mentha × piperita): Known for its strong, menthol flavor and aroma.
-
Spearmint (Mentha spicata): Milder and sweeter than peppermint, great for culinary uses.
-
Chocolate Mint (Mentha × piperita ‘Chocolate’): Offers a unique flavor with chocolate undertones.
Choose a variety that suits your taste and culinary needs.
Step 2: Gather Your Supplies
To propagate mint from stem cuttings, you will need:
- Healthy mint stems (6-8 inches long)
- Scissors or pruning shears
- A clean glass jar or a small pot with soil
- Water
- Optional: rooting hormone (not necessary, but can speed up the process)

Step 3: Taking Stem Cuttings
-
Cut the Stems: Select healthy mint stems from an adult plant. Look for stems that are vibrant, green, and free from any disease. Using sharp scissors, take cuttings about 6-8 inches long.
-
Remove Lower Leaves: Strip off the leaves from the bottom 2-3 inches of the stem, leaving a few leaves at the top. This encourages root growth while preventing rot in the water or soil.
Step 4: Rooting the Cuttings
There are two primary methods for rooting your mint cuttings: in water or in soil.
Method 1: Water Propagation
-
Place in Water: Place the cut stem in a clean glass jar filled with water, ensuring that the submerged part has no leaves.
-
Sunlight: Put the jar in a location with indirect sunlight.
-
Change Water: Change the water every few days to prevent stagnation and bacterial growth.
-
Watch for Roots: In about 7-14 days, you’ll notice roots starting to grow from the cut end. When the roots are a few inches long, your cutting is ready to be planted in soil.

Method 2: Soil Propagation
-
Prepare Potting Mix: If you choose to root your cuttings in the soil, fill a small pot with a well-draining potting mix.
-
Plant the Cuttings: Make a small hole in the potting mix using your finger or a pencil. Insert the cutting, making sure at least one node (the bump where the leaves were) is buried in the soil.
-
Watering: Water the soil lightly to settle it around the cutting, ensuring it is moist but not soggy.
-
Humidity: You can cover the pot with a plastic bag to create a greenhouse effect, maintaining humidity and promoting root growth. Just remember to open it occasionally to prevent mold buildup.
Step 5: Transplanting
Once your cuttings have developed a healthy root system (2-3 inches for water propagation and evident growth for soil propagation), it’s time to transplant them into your garden or larger pots.
-
Choose a Location: Find a spot in your garden that receives partial to full sunlight. Mint prefers rich, moist soil, so consider enhancing your garden bed with compost.
-
Spacing: Mint can spread quickly, so plant your cuttings about 12-18 inches apart to give them space to grow.
-
Watering: After transplanting, water the newly planted cuttings well. Continue to keep the soil moist, especially during dry spells.

Step 6: Caring for Your Mint Plant
-
Watering: Mint requires consistent watering but avoid waterlogging. The top inch of the soil should be dry before rewatering.
-
Pruning: Regularly prune your mint plants to encourage bushier growth. Snip off the flowering buds to keep the plant focused on leaf production.
-
Fertilizing: While mint doesn’t require heavy fertilization, you can add a balanced, organic fertilizer once or twice during the growing season to promote healthy growth.
-
Pest Management: Keep an eye out for pests like aphids or spider mites. Neem oil or insecticidal soap can help manage these pests if needed.
-
Harvesting: Start harvesting your mint when the plant is well-established and has plenty of leaves. Regular harvesting encourages growth, so don’t be shy to snip away!
FAQs about Growing Mint from Cuttings
Q1: Can I grow mint indoors?
A: Yes, mint can thrive indoors. Just ensure it receives adequate sunlight, ideally six hours of indirect sunlight each day, and maintain humidity.
Q2: How do I know when to harvest mint?

A: You can begin harvesting once the plant has enough leaves to sustain itself, typically around 4-6 weeks after planting. Always leave some leaves so the plant can continue to grow.
Q3: How often should I water mint?
A: Mint likes moist soil but not soggy conditions. Water when the top inch of soil feels dry. During hot weather, you may need to water more frequently.
Q4: What diseases affect mint?
A: Mint can suffer from fungal diseases, like downy mildew, or attract pests. Ensuring good airflow and proper moisture can help prevent these issues.
Q5: Can I propagate mint in winter?
A: While spring and summer are ideal, you can propagate mint indoors in winter as long as you provide adequate light and warmth.
Conclusion
Growing fresh mint from stem cuttings is a simple and rewarding process. By following the steps outlined above, you can enjoy an endless supply of this fragrant herb in your garden or kitchen. Whether you’re adding it to your favorite dishes or using it for herbal tea, homegrown mint is a delightful addition to any culinary adventure. So grab some cuttings, start propagating, and savor the fresh flavors of mint all year round!